一.变量
1.value变量
示例1
input:
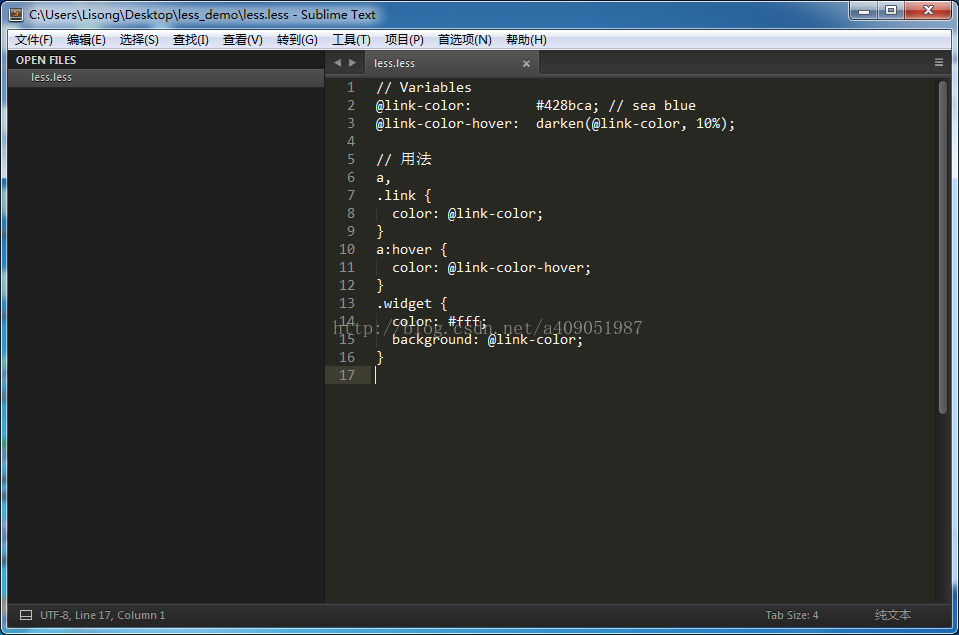
// Variables
@link-color:        #428bca; // sea blue
@link-color-hover:  darken(@link-color, 10%);

// 用法
a,
.link {
  color: @link-color;
}
a:hover {
  color: @link-color-hover;
}
.widget {
  color: #fff;
  background: @link-color;
}
output:
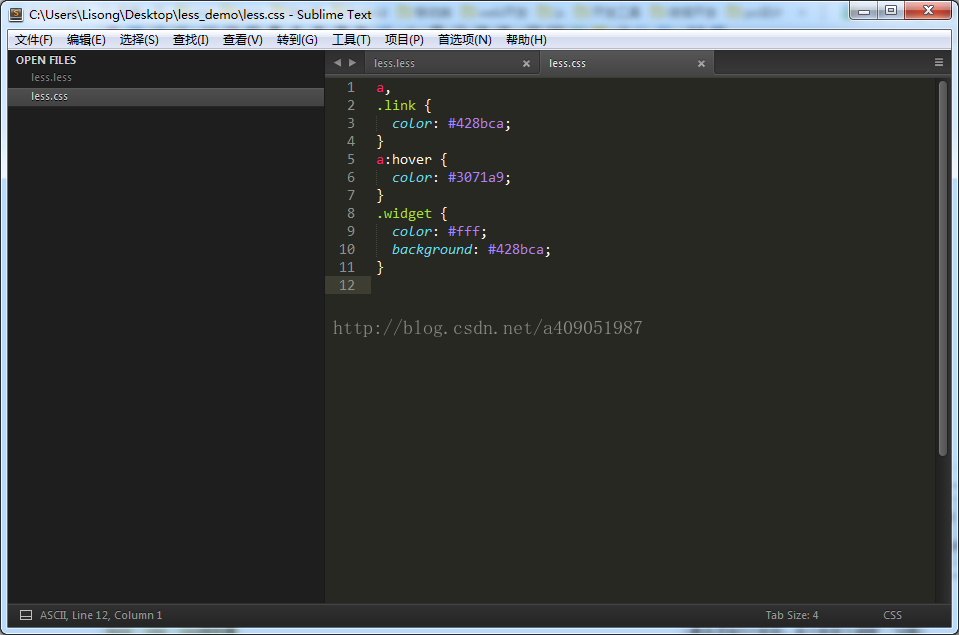
a,
.link {
  color: #428bca;
}
a:hover {
  color: #3071a9;
}
.widget {
  color: #fff;
  background: #428bca;
}
简单编译:
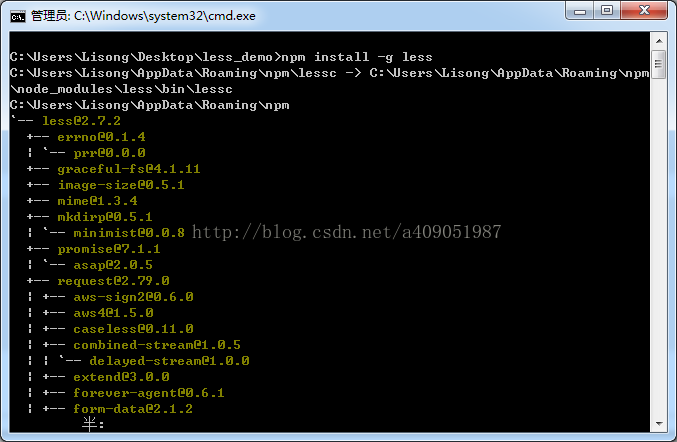
1.安装less

2.新建less.less

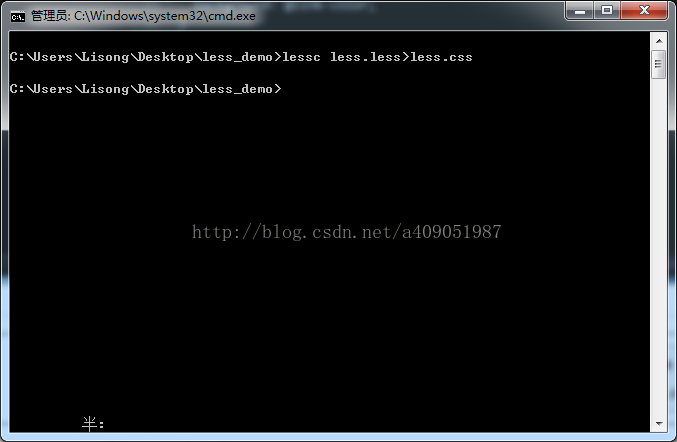
3.编译less.less

此时就生成了less.css

2.selector变量
示例1
input:
// Variables
@mySelector: banner;

// Usage
.@{mySelector} {
  font-weight: bold;
  line-height: 40px;
  margin: 0 auto;
}
output:
.banner {
  font-weight: bold;
  line-height: 40px;
  margin: 0 auto;
}
3.url变量
示例1 input:
// Variables
@images: "../img";

// 用法
body {
  color: #444;
  background: url("@{images}/white-sand.png");
}
output:
body {
  color: #444;
  background: url("../img/white-sand.png");
}
4.Import statement(导入语句)变量
示例1
input:
// Variables
@images: "../img";
@out:"import";
@import "@{out}.less";
// 用法
body {
  color: #444;
  background: url("@{images}/white-sand.png");
}
import.less:
// Variables
@mySelector: banner;

// Usage
.@{mySelector} {
  font-weight: bold;
  line-height: 40px;
  margin: 0 auto;
}
output:
.banner {
  font-weight: bold;
  line-height: 40px;
  margin: 0 auto;
}
body {
  color: #444;
  background: url("../img/white-sand.png");
}
5.属性变量
示例1
input:
@property: color;

.widget {
  @{property}: #0ee;
  background-@{property}: #999;
}
output:
.widget {
  color: #0ee;
  background-color: #999;
}
6.变量名变量
input:
@fnord:  "#fff";
@var:    "fnord";
.class1{
    color:@@var;
}
output:
.class1 {
  color: "#fff";
}
7.变量懒加载(Lazy Loading)
官方解释:Variables are lazy loaded and do not have to be declared before being used(编译器在编译less文件时,会先解析所有的变量,所以可以先使用变量,稍后再定义)
示例1 input:
.lazy-eval {
  width: @var;
}

@var: @a;
@a: 9%;
output:
.lazy-eval {
  width: 9%;
}
示例2
input:
.lazy-eval-scope {
  width: @var;
  @a: 9%;
}

@var: @a;
@a: 100%;
output:
.lazy-eval {
  width: 9%;
}
注意:@a的作用域
示例3
input:
@var: 0;
.class1 {
  @var: 1;
  .class {
    @var: 2;
    three: @var;
    @var: 3;
  }
  one: @var;
}
output:
.class1 {
  one: 1;
}
.class1 .class {
  three: 3;
}
8.默认变量
示例1
input:
@import "import.less";
@dark-color:green;
.class1{
    color:@dark-color
}
.class2{
    color:@white-color
}
import.less
@white-color: #fff;
output:
.class1 {
  color: green;
}
.class2 {
  color: #fff;
}
示例2
input:
@dark-color:green;
@import "import.less";
.class1{
    color:@dark-color
}
.class2{
    color:@white-color
}
import.less
@dark-color: #000;
@white-color: #fff;
output:
.class1 {
  color: #000;
}
.class2 {
  color: #fff;
}
注意:后面定义的会覆盖前面定义的
二.Extend(继承)
1.Extend attached to selector(为选择器附加扩展)
示例1
input:
.big-division,
.big-bag:extend(.bag),
.big-bucket:extend(.bucket) {
    width:1px;
}
.bag{
    color:#fff;
}
.bucket{
    background-color:#000;
}
注意:被继承的类,可以定义在后面
output:
.bag,
.big-bag {
  color: #fff;
}
.bucket,
.big-bucket {
  background-color: #000;
}
.big-division,
.big-bag,
.big-bucket {
  width: 1px;
}
2.Extend inside ruleset(规则集内的扩展)
示例1
input:
a:hover,
.some-class {
  &:extend(div span);
}
div span{
    color:red;
}
output:
div span,
a:hover,
.some-class {
  color: red;
}
### 3.Extending nested Selectors(嵌套选择器中的扩展)
示例1

input:
```css
.bucket {
  tr { // nested ruleset with target selector
    color: blue;
  }
}
.some-class:extend(.bucket tr) {} // nested ruleset is recognized
output:
.bucket tr,
.some-class {
  color: blue;
}
示例2
input:
.bucket {
  tr & { // nested ruleset with target selector
    color: blue;
  }
}
.some-class:extend(tr .bucket) {} // nested ruleset is recognized
注意:&代表父选择器
output:
tr .bucket,
.some-class {
  color: blue;
}
4.Exact Matching with Extend(扩展中的精确匹配)
示例1
input:
.a.class,
.class.a,
.class > .a {
  color: blue;
}
.test:extend(.class) {} // 不会匹配上面的.class
output:
.a.class,
.class.a,
.class > .a {
  color: blue;
}
示例2
input:
*.class {
  color: blue;
}
.noStar:extend(.class) {} // 不会匹配*.class
output:
*.class {
  color: blue;
}
示例3
input:
link:hover:visited {
  color: blue;
}
.selector:extend(link:visited:hover) {}//不会匹配上面的,顺序不一样
output:
link:hover:visited {
  color: blue;
}
5.nth expression(nth表达式)
示例1
input:
:nth-child(1n+3) {
  color: blue;
}
.child:extend(:nth-child(1n+3)) {}
output:
:nth-child(1n+3),
.child {
  color: blue;
}
示例2
input:
:nth-child(1n+3) {
  color: blue;
}
.child:extend(:nth-child(n+3)) {}//不会匹配:nth-child(1n+3)
output:
:nth-child(1n+3) {
  color: blue;
}
示例3
input:
[title=identifier] {
  color: blue;
}
[title='identifier'] {
  color: blue;
}
[title="identifier"] {
  color: blue;
}

.noQuote:extend([title=identifier]) {}
.singleQuote:extend([title='identifier']) {}
.doubleQuote:extend([title="identifier"]) {}
注意:选择器属性值带引号和不带引号效果是一样的
output:
[title=identifier],
.noQuote,
.singleQuote,
.doubleQuote {
  color: blue;
}
[title='identifier'],
.noQuote,
.singleQuote,
.doubleQuote {
  color: blue;
}
[title="identifier"],
.noQuote,
.singleQuote,
.doubleQuote {
  color: blue;
}
6.Extend “all”
示例1
input:
.a.b.test,
.test.c {
  color: orange;
}
.test {
  &:hover {
    color: green;
  }
}

.replacement:extend(.test all) {}
output:
.a.b.test,
.test.c,
.a.b.replacement,
.replacement.c {
  color: orange;
}
.test:hover,
.replacement:hover {
  color: green;
}
7.Selector Interpolation with Extend(扩展中的选择器插值)
示例1
input:
@variable: .bucket;
@{variable} { // interpolated selector
  color: blue;
}
.some-class:extend(.bucket) {} //上面的.bucket是有变量补全的,不会匹配
output:
.bucket {
  color: blue;
}
示例2
input:
.bucket {
  color: blue;
}
.some-class:extend(@{variable}) {} // interpolated selector matches nothing
@variable: .bucket;
output:
.bucket {
  color: blue;
}
示例3
input:
.bucket {
  color: blue;
}
@{variable}:extend(.bucket) {}//However, :extend attached to an interpolated selector works
@variable: .selector;
output:
.bucket,
.selector {
  color: blue;
}
8.Scoping / Extend Inside @media(作用域/@media内的扩展)
示例1
input:
@media print {
  .screenClass:extend(.selector) {} // extend inside media
  .selector { // this will be matched - it is in the same media
    color: black;
  }
}
.selector { // ruleset on top of style sheet - extend ignores it
  color: red;
}
@media screen {
  .selector {  // ruleset inside another media - extend ignores it
    color: blue;
  }
}
output:
@media print {
  .selector,
  .screenClass {
    color: black;
  }
}
.selector {
  color: red;
}
@media screen {
  .selector {
    color: blue;
  }
}
注意:在媒体查询大括号里的继承只能继承该媒体查询里面的选择器
示例2
input:
@media screen {
  .screenClass:extend(.selector) {} // extend inside media
  @media (min-width: 1023px) {
    .selector {  // ruleset inside nested media - extend ignores it
      color: blue;
    }
  }
}
output:
@media screen {
}
@media screen and (min-width: 1023px) {
  .selector {
    color: blue;
  }
}
注意:在媒体查询大括号里的继承不能继承同级的其他的媒体查询里的选择器
示例3
input:
@media screen {
  .selector {  /* ruleset inside nested media - top level extend works */
    color: blue;
  }
  @media (min-width: 1023px) {
    .selector {  /* ruleset inside nested media - top level extend works */
      color: blue;
    }
  }
}
.topLevel:extend(.selector) {} /* top level extend matches everything */
output:
@media screen {
  .selector,
  .topLevel {
     color: blue;
  }
}
@media screen and (min-width: 1023px) {
  .selector,
  .topLevel {
      color: blue;
  }
}
注意:全局的选择器可以继承媒体查询里面的选择器,并且会被加入到该媒体查询里面
9.Duplication Detection(重复检测)
示例1
input:
.alert-info,
.widget {
    color:red;
}

.alert:extend(.alert-info, .widget) {}
output:
.alert-info,
.widget,
.alert,
.alert {/*生成了两个.alert*/
  color: red;
}
10.Classic Use Case (经典用例)
经典用于就是避免添加基础类。比如,如果你有
.animal {
  background-color: black;
  color: white;
}
如果你想有一个animal子类型,并且要重写背景颜色。那么你有两个选择,首先改变你的HTML
Bear
.animal {
  background-color: black;
  color: white;
}
.bear {
  background-color: brown;
}
或者简化HTML,然后在你的less中使用extend,比如:
Bear
.animal {
  background-color: black;
  color: white;
}
.bear {
  &:extend(.animal);
  background-color: brown;
}
11.Reducing CSS Size (CSS尺寸归并)
Mixins会复制所有的属性到选择器中,这可能导致不必要的重复。因此你可以使用extend来代替mixin将你要用的属性移过去,这样就会生成更少的CSS。
mixin示例:
.my-inline-block() {
    display: inline-block;
  font-size: 0;
}
.thing1 {
  .my-inline-block;
}
.thing2 {
  .my-inline-block;
}
输出:
.thing1 {
  display: inline-block;
  font-size: 0;
}
.thing2 {
  display: inline-block;
  font-size: 0;
}
示例 (用扩展):
.my-inline-block {
  display: inline-block;
  font-size: 0;
}
.thing1 {
  &:extend(.my-inline-block);
}
.thing2 {
  &:extend(.my-inline-block);
}
输出:
.my-inline-block,
.thing1,
.thing2 {
  display: inline-block;
  font-size: 0;
}
12.Combining Styles / a more advanced mixin (合并样式/更高级的mixin)
另一个用例可以用作mixin的替代 – 因为mixin仅仅能用于简单的选择器,如果你的html中有两个不同的块,但是你需要为这两个块应用相同的样式,那么你可以使用extend来关联这两块。
示例:
li.list > a {
  // list styles
}
button.list-style {
  &:extend(li.list > a); // 使用相同的列表样式
}
三.mixins
1.”mix-in” properties from existing styles
示例1
input:
.a, #b {
  color: red;
}
.mixin-class {
  .a();
}
.mixin-id {
  #b();
}
output:
.a,
#b {
  color: red;
}
.mixin-class {
  color: red;
}
.mixin-id {
  color: red;
}
2.Not outputting the mixin (不输出混合集)
示例1
input:
.my-mixin {
  color: black;
}
.my-other-mixin() {//加上括号后,混合集就不会输出到编译好的样式中了
  background: white;
}
.class {
  .my-mixin;
  .my-other-mixin;
}
output:
.my-mixin {
  color: black;
}
.class {
  color: black;
  background: white;
}
3.Selectors in mixins (带选择器的混合集)
示例1
input:
.my-hover-mixin() {
  &:hover {
    border: 1px solid red;
  }
}
button {
  .my-hover-mixin();
}
output:
button:hover {
  border: 1px solid red;
}
示例2
input:
.my-hover-mixin {
  &:hover {
    border: 1px solid red;
  }
}
button {
  .my-hover-mixin();
}
ouput:
.my-hover-mixin:hover {
  border: 1px solid red;
}
button:hover {
  border: 1px solid red;
}
4.Namespaces (命名空间)
示例1
input:
#outer {
  .inner {
    color: red;
  }
}

.c {
  #outer > .inner;
}
output:
#outer .inner {
  color: red;
}
.c {
  color: red;
}
注意:
// 下面四种写法效果是一样的
#outer > .inner;
#outer > .inner();
#outer.inner;
#outer.inner();
这种用法的效果相当于我们熟知的命名空间,你可以把混合集放到一个id选择器里面,这样可以确保它(这个混合集)不会跟其他的库冲突。
例如示例2
input:
#my-library {
  .my-mixin() {
    color: black;
  }
}
// 可以这样调用
.class {
  #my-library > .my-mixin();
}
output:
.class {
  color: black;
}
示例3
input:
#outer {
  &.inner {
    color: red;
  }
}
.c {
  #outer > .inner;//对于这种方式,上面的&对.c是无效的
}
output:
#outer.inner {
  color: red;
}
.c {
  color: red;
}
5.The !important keyword (!important 关键字)
示例1
input:
.foo (@bg: #f5f5f5, @color: #900) {
  background: @bg;
  color: @color;
}
.unimportant {
  .foo(1);
}
.important {
  .foo(2) !important;
}
output:
.unimportant {
  background: 1;
  color: #900;
}
.important {
  background: 2 !important;
  color: #900 !important;
}
四.Parametric Mixins (带参数的混合)
1.How to pass arguments to mixins
示例1
input:
.wrap() {//带括号后,混合集不会输出到编译好的样式表中
  text-wrap: wrap;
  white-space: -moz-pre-wrap;
  white-space: pre-wrap;
  word-wrap: break-word;
}
pre { .wrap }
output:
pre {
  text-wrap: wrap;
  white-space: -moz-pre-wrap;
  white-space: pre-wrap;
  word-wrap: break-word;
}
示例2
input:
.border-radius(@radius) {
  -webkit-border-radius: @radius;
     -moz-border-radius: @radius;
          border-radius: @radius;
}
#header {
  .border-radius(4px);
}
.button {
  .border-radius(6px);
}
output:
#header {
  -webkit-border-radius: 4px;
  -moz-border-radius: 4px;
  border-radius: 4px;
}
.button {
  -webkit-border-radius: 6px;
  -moz-border-radius: 6px;
  border-radius: 6px;
}
2.Mixins With Multiple Parameters (带多个参数的mixins)
多个参数可以用分号或者逗号分割。但是推荐使用分号分割。因为逗号符号有两个意思:它可以解释为mixins参数分隔符或者css列表分隔符。
示例1
input:
.mixin(@color) {
  color-1: @color;
}
.mixin(@color; @padding:2) {
  color-2: @color;
  padding-2: @padding;
}
.mixin(@color; @padding; @margin: 2) {
  color-3: @color;
  padding-3: @padding;
  margin: @margin @margin @margin @margin;
}
.some .selector div {
  .mixin(#008000);
}
.other{
  .mixin(#fff;#000);
}
output:
.some .selector div {
  color-1: #008000;
  color-2: #008000;
  padding-2: 2;
}
.other {
  color-2: #fff;
  padding-2: #000;
  color-3: #fff;
  padding-3: #000;
  margin: 2 2 2 2;
}
3.Named Parameters (命名参数)
引用mixin时可以通过参数名称而不是参数的位置来为mixin提供参数值。任何参数都已通过它的名称来引用,这样就不必按照任意特定的顺序来使用参数
示例1
input:
.mixin(@color: black; @margin: 10px; @padding: 20px) {
  color: @color;
  margin: @margin;
  padding: @padding;
}
.class1 {
  .mixin(@margin: 20px; @color: #33acfe);
}
.class2 {
  .mixin(#efca44; @padding: 40px);
}
output:
.class1 {
  color: #33acfe;
  margin: 20px;
  padding: 20px;
}
.class2 {
  color: #efca44;
  margin: 10px;
  padding: 40px;
}
4.The @arguments variable (@arguments 变量)
示例1
input:
.box-shadow(@x: 0; @y: 0; @blur: 1px; @color: #000) {
  -webkit-box-shadow: @arguments;
     -moz-box-shadow: @arguments;
          box-shadow: @arguments;
}
.big-block {
  .box-shadow(2px; 5px);
}
output:
.big-block {
  -webkit-box-shadow: 2px 5px 1px #000;
  -moz-box-shadow: 2px 5px 1px #000;
  box-shadow: 2px 5px 1px #000;
}
5.Advanced arguments and the @rest variable (高级参数和@rest变量)
如果你希望你的mixin接受数量不定的参数,你可以使用…。在变量名后面使用它,它会将这些参数分配给变量。
.mixin(...) {        // matches 0-N arguments
.mixin() {           // matches exactly 0 arguments
.mixin(@a: 1) {      // matches 0-1 arguments
.mixin(@a: 1; ...) { // matches 0-N arguments
.mixin(@a; ...) {    // matches 1-N arguments
此外:
.mixin(@a; @rest...) {
   // @rest is bound to arguments after @a
   // @arguments is bound to all arguments
}
示例1
input:
.mixin(@a,...){
    color:blue;
}
.mixin(...){
    color:red;
}
.class1{
    .mixin(1);
}
output:
.class1 {
  color: blue;
  color: red;
}
示例2 input:
.box-shadow(...) {
  -webkit-box-shadow: @arguments;
     -moz-box-shadow: @arguments;
          box-shadow: @arguments;
}
.box-shadow(@a,@rest...) {
  -webkit-box-shadow: @rest;
     -moz-box-shadow: @rest;
          box-shadow: @rest;
}
.big-block {
  .box-shadow(2px,5px,#fff);
}
output:
.big-block {
  -webkit-box-shadow: 2px 5px #fff;
  -moz-box-shadow: 2px 5px #fff;
  box-shadow: 2px 5px #fff;
  -webkit-box-shadow: 5px #fff;
  -moz-box-shadow: 5px #fff;
  box-shadow: 5px #fff;
}
6.Pattern-matching (模式匹配)
示例1
input:
.mixin(dark; @color) {
  color: darken(@color, 10%);
}
.mixin(light; @color) {
  color: lighten(@color, 10%);
}
.mixin(@_; @color) {
  display: block;
}


@switch: light;
.class {
  .mixin(@switch; #888);
}
output:
.class {
  color: #a2a2a2;
  display: block;
}
五.Mixins as Functions (作为函数使用的混合)
1.从mixin中返回变量
示例1
input:
.mixin() {
  @width:  100%;
  @height: 200px;
}

.caller {
  .mixin();
  width:  @width;
  height: @height;
}
output:
.caller {
  width: 100%;
  height: 200px;
}
示例2
input:
.average(@x, @y) {
  @average: ((@x + @y) / 2);
}

div {
  .average(16px, 50px); // "call" the mixin
  padding: @average;    // use its "return" value
}
output:
div {
  padding: 33px;
}
直接定义在调用者作用域内的变量不能被重写。然而,定义在调用者父级作用域内的变量是不是受保护的,将被重写:
示例3
input:
.mixin() {
  @size: in-mixin;
  @definedOnlyInMixin: in-mixin;
}

.class {
  @definedOnlyInMixin:in-class;
  margin: @size @definedOnlyInMixin;
  .mixin();
}
@size: globaly-defined-value; // 调用者父级作用域 - 不受保护
output:
.class {
  margin: in-mixin in-class;
}
最后,定义在mixin中的mixin同样可以作为返回值:
示例4
input:
.unlock(@value) { // 外层的 mixin
  .doSomething() { // 被嵌套的 mixin
    declaration: @value;
  }
}

#namespace {
  .unlock(5); // unlock doSomething mixin
  .doSomething(); //嵌套混入被复制到这里,并可用
}
output:
#namespace {
  declaration: 5;
}
六.Passing Rulesets to Mixins (传递规则集给混合)
1.detached ruleset(分离规则集合)
分离(detached)规则集合是一组CSS属性,嵌套的规则集合,媒体声明或是存储在一个变量中的任何其他东西。你可以将其包含到一个规则集合或其他结构中,它的所有属性将被复制在那里。你也可以使用它作为一个mixin参数,并传递它周围的其他任何变量。
示例1
input:
// 声明 detached 规则集合
@detached-ruleset: { background: red; };

// 使用 detached 规则集合
.top {
    @detached-ruleset();
}
output:
.top {
  background: red;
}
注意:分离(detached)规则集合调用时,其后面的圆括号是必须的, @detached-ruleset; 这样调用是无效的。 当你希望定义一个mixin将一个媒体查询中的一个代码块或者一个浏览器不支持的类名抽象出来时很有用。规则集合可以传递规则集给mixin,所以该mixin会包装这些内容。比如:
示例2
input:
.desktop-and-old-ie(@rules) {
  @media screen and (min-width: 1200) { @rules(); }
  html.lt-ie9 &                       { @rules(); }
}

header {
  background-color: blue;

  .desktop-and-old-ie({
    background-color: red;
  });
}
output:
header {
  background-color: blue;
}
@media screen and (min-width: 1200) {
  header {
    background-color: red;
  }
}
html.lt-ie9 header {
  background-color: red;
}
注意:如果有媒体查询,则生成的最终样式会放在媒体查询里面
示例3
input:
@my-ruleset: {
    .my-selector {
      @media tv {
        background-color: black;
      }
    }
  };
@media (orientation:portrait) {
    @my-ruleset();
}
output:
@media (orientation: portrait) and tv {
  .my-selector {
    background-color: black;
  }
}
分离规则集合可以返回所有它的mixins给调用者,可以以同样的方式调用mixin。但是,它不会返回变量。
示例4
input:
// 带有mixin的分离规则集合
@detached-ruleset: {
    .mixin() {
        color:blue;
    }
};
// 调用分离规则集合
.caller {
    @detached-ruleset();
    .mixin();
}
output:
.caller {
  color: blue;
}
示例5
input:
@detached-ruleset: {
    @color:blue; // 私有变量
};
.caller {
    @detached-ruleset();
    color: @color; // 语法错误
}
2.Scoping (作用域)
分离规则集合可以在它被 定义 和被 调用 的地方使用所有变量和混入。换句话说, 定义和调用的作用域对它都是有效的。如果这两个作用域包含相同的变量或混入,声明的作用域中的值优先。
1.Definition and Caller Scope Visibility (定义和调用者作用域的可见性)
示例1
input:
@detached-ruleset: {
  caller-variable: @callerVariable; // 这里变量是 undefined
  .callerMixin(); // 这里混合是 undefined
};

selector {
  // 使用分离规则集合
  @detached-ruleset();

  // 需要在分离规则集合内定义变量和混合
  @callerVariable: value;
  .callerMixin() {
    variable: declaration;
  }
}
output:
selector {
  caller-variable: value;
  variable: declaration;
}
示例2
input:
@variable: global;
@detached-ruleset: {
  // 将使用全局变量,因为他是访问形式定义的分离规则集合
  variable: @variable;
};

selector {
  @detached-ruleset();
  @variable: value; // 在调用者内部定义的变量 - 将被忽略
}
output:
selector {
  variable: global;
}
2.Referencing Won’t Modify Detached Ruleset Scope (引用 不会 修改分离规则集合的作用域)
示例1
input:
@detached-1: { scope-detached: @one @two; };
.one {
  @one: visible;
  .two {
    @detached-2: @detached-1; // 拷贝/重命名 规则集合
    @two: visible; // 规则集合不能使用visible
  }
}

.usePlace {
  .one > .two();
  @detached-2();
}
ouput:: 编译出错:@one未定义
示例2
input:
@detached-1: { scope-detached: @one @two; };
.one {
  .two {
    @one: visible;
    @detached-2: @detached-1; // 拷贝/重命名 规则集合
    @two: visible; // 规则集合不能使用visible
  }
}

.usePlace {
  .one > .two();
  @detached-2();
}
output:
.usePlace {
  scope-detached: visible visible;
}
3.Unlocking Will Modify Detached Ruleset Scope (解锁 会 修改分离规则集合的作用域) 示例1
input:
#space {
  .importer1() {
    @detached: { scope-detached: @variable; }; // 定义分离规则集合
  }
}

.importer2() {
  @variable: value; // 解锁分离规则集合能使用这个变量
  #space > .importer1(); // 解锁/导入分离规则集合
}

.usePlace {
  .importer2(); // 第二次解锁/导入分离规则集合
   @detached();
}
output:
.usePlace {
  scope-detached: value;
}
七.Import Directives (导入准则)
1.@import语句
在标准的CSS中,@import必须在所有其他类型的规则之前。但是Less.js不在乎你把@import语句放在什么位置。
示例1
input:
.class1{
    color:@dark-color;
}
@import "import.less";
import.less:
[css] view plain copy
@dark-color:#000;
.class2{
  color:red;
}
output:
.class1 {
  color: #000;
}
.class2 {
  color: red;
}
2.File extensions (文件扩展名)
@import语句会通过Less依赖文件扩展名的方式区别对待不同的文件:
- 如果文件有一个.css扩展名,则将它作为CSS对象,同时@import语句保持不变(查看下面的inline选项)
- 如果有其他扩展名,则作为Less对象,然后导入它。
- 如果没有扩展名,则插入.less,然后将它作为Less文件导入包含进来。
示例:
@import "foo";      // foo.less is imported
@import "foo.less"; // foo.less is imported
@import "foo.php";  // foo.php imported as a less file
@import "foo.css";  // statement left in place, as-is
八.Import Options (导入选项)
Less提供了一系列的CSS扩展来让你使用@import更灵活的导入第三方CSS文件。
语法:@import (keyword) “filename”;
下面导入指令已经被实现了:
- reference:使用Less文件但不输出
- inline:在输出中包含源文件但不加工它
- less:将文件作为Less文件对象,无论是什么文件扩展名
- css:将文件作为CSS文件对象,无论是什么文件扩展名
- once:只包含文件一次(默认行为)
- multiple:包含文件多次
1.reference (引用)
示例1
input:
.class1{
    color:@dark-color;
}
@import (reference) "import.less";
import.less:
[css] view plain copy
@dark-color:#000;
.class2{
  color:red;
}
output:
.class1 {
  color: #000;
}
2.inline
示例1
input:
.class1{
    color:@dark-color;
}
@import (inline) "import.less";
import.less:
@dark-color:#000;
.class2{
  color:red;
}
output:
.class1 {
  color: #000;
}
@dark-color:#000;
.class2{
    color:red;
}
3.less
示例1
input:
.class1{
    color:@dark-color;
}
@import (less) "import.css";
import.less:
@dark-color:#000;
.class2{
  color:red;
}
output:
.class1 {
  color: #000;
}
.class2 {
  color: red;
}
4.css
示例1
input:
.class1{
    color:green;
}
@import (css) "import.less";
output:
@import "import.less";
.class1 {
  color: green;
}
5.once
@import (once) "foo.less";
@import (once) "foo.less"; // this statement will be ignored
6.multiple
示例1
input:
@import (multiple) "import.less";
@import (multiple) "import.less";
import.less:
.class2{
    color:red;
}
output:
.class2 {
  color: red;
}
.class2 {
  color: red;
}
九.Mixin Guards(带条件的Mixin)
1.when关键字
示例1
input:
.mixin (@a) when (lightness(@a) >= 50%) {
  background-color: black;
}
.mixin (@a) when (lightness(@a) < 50%) {
  background-color: white;
}
.mixin (@a) {
  color: @a;
}
.class1 { .mixin(#ddd) }
.class2 { .mixin(#555) }
ouput:
.class1 {
  background-color: black;
  color: #ddd;
}
.class2 {
  background-color: white;
  color: #555;
}
2.Guard comparison operators (Guard中的比较运算符)
guards中可用的比较运算符的完整列表为: >, >=, =, =<, <。
示例1 input:
@media: mobile;

.mixin (@a) when (@media = mobile) { color:red; }
.mixin (@a) when (@media = desktop) { color:green; }

.max (@a; @b) when (@a > @b) { width: @a }
.max (@a; @b) when (@a < @b) { width: @b }
.class1{
    .mixin(mobile);
}
.class2{
    .max(5,10);
}
output:
.class1 {
  color: red;
}
.class2 {
  width: 10;
}
3.Guard logical operators (Guard逻辑运算符)
使用and关键字来组合guards
示例1
input:
.mixin (@a) when (isnumber(@a)) and (@a > 0) { color:red };
.class1{
    .mixin(1);
}
.class2{
    .mixin(0);
}
ouput:
.class1 {
  color: red;
}
通过用逗号 , 分隔guards来模仿 or 运算符
示例1
input:
.mixin (@a) when (isnumber(@a)) , (@a > 0) { color:red };
.class1{
    .mixin(1);
}
.class2{
    .mixin(0);
}
output:
.class1 {
  color: red;
}
.class2 {
  color: red;
}
4.Type checking functions (类型检查函数)
下面是一些基本的类型检查函数:
- iscolor
- isnumber
- isstring
- iskeyword
- isurl
如果你想检查一个值除了数字是否是一个特定的单位,你可以使用下列方法之一:
- ispixel
- ispercentage
- isem
- isunit
十.CSS Guards(css 约束)
约束也适用于CSS选择器,这是一个声明mixin的语法糖,会立即调用它。
例如,在1.5.0之前你不得不这样做。
.my-optional-style() when (@my-option = true) {
  button {
    color: white;
  }
}
.my-optional-style();
现在你可以直接在样式上编写约束。
示例1
input:
button when (@my-option = true) {
  color: white;
}
@my-option : true;
output:
[css] view plain copy
button {
  color: white;
}
你还可以通过与&特性结合实现’if’类型的语句,从而允许组合多个约束。
示例2
input:
button{
    & when (@my-option = true) {
      &{
        color: white;
      }
    }
    & when (@my-option = false) {
      &{
        color: black;
      }
    }
}
@my-option:false;
output:
button {
  color: black;
}
十一.Loops (循环)
示例1
input:
.generate-columns(4);

.generate-columns(@n, @i: 1) when (@i =< @n) {
  .column-@{i} {
    width: (@i * 100% / @n);
  }
  .generate-columns(@n, (@i + 1));
}
output:
.column-1 {
  width: 25%;
}
.column-2 {
  width: 50%;
}
.column-3 {
  width: 75%;
}
.column-4 {
  width: 100%;
}
十二.Merge (合并属性)
1.Comma (逗号)
通过逗号添加属性的值。
示例1
input:
.mixin() {
  box-shadow+: inset 0 0 10px #555;
}
.myclass {
  .mixin();
  box-shadow+: 0 0 20px black;
}
output:
.myclass {
  box-shadow: inset 0 0 10px #555, 0 0 20px black;
}
2.Space (作用域)
作用域内附加属性(用空格分隔)
示例1
input:
.mixin() {
  transform+_: scale(2);
}
.myclass {
  .mixin();
  transform+_: rotate(15deg);
}
output:
.myclass {
  transform: scale(2) rotate(15deg);
}
十三.Parent Selectors (父级选择器)
& 运算符表示一个 嵌套规则 的父选择器,它在应用修改类或者应用伪类给现有选择器时最常用
1.single&
示例1
input:
.button {
  &-ok {
    background-image: url("ok.png");
  }
  &-cancel {
    background-image: url("cancel.png");
  }

  &-custom {
    background-image: url("custom.png");
  }
}
output:
.button-ok {
  background-image: url("ok.png");
}
.button-cancel {
  background-image: url("cancel.png");
}
.button-custom {
  background-image: url("custom.png");
}
2.Multiple & (多个 &)
示例1
input:
.link {
  & + & {
    color: red;
  }

  & & {
    color: green;
  }

  && {
    color: blue;
  }

  &, &ish; {
    color: cyan;
  }
}
output:
.link + .link {
  color: red;
}
.link .link {
  color: green;
}
.link.link {
  color: blue;
}
.link,
.linkish {
  color: cyan;
}
&代表所有的父选择器(而不只是最近的长辈):
示例2
input:
.grand {
  .parent {
    & > & {
      color: red;
    }

    & & {
      color: green;
    }

    && {
      color: blue;
    }

    &, &ish; {
      color: cyan;
    }
  }
}
output:
.grand .parent > .grand .parent {
  color: red;
}
.grand .parent .grand .parent {
  color: green;
}
.grand .parent.grand .parent {
  color: blue;
}
.grand .parent,
.grand .parentish {
  color: cyan;
}
3.Changing selector order (改变选择器顺序)
示例1
input:
.header {
  .menu {
    border-radius: 5px;
    .no-borderradius & {
      background-image: url('images/button-background.png');
    }
  }
}
output:
.header .menu {
  border-radius: 5px;
}
.no-borderradius .header .menu {
  background-image: url('images/button-background.png');
}
4.Combinatorial explosion
&还可以用于生成一个逗号分割列表的所有可能的选择器排列:
示例1
input:
p, a, ul, li {
  border-top: 2px dotted #366;
  & + & {
    border-top: 0;
  }
}
output:
p,
a,
ul,
li {
  border-top: 2px dotted #366;
}
p + p,
p + a,
p + ul,
p + li,
a + p,
a + a,
a + ul,
a + li,
ul + p,
ul + a,
ul + ul,
ul + li,
li + p,
li + a,
li + ul,
li + li {
  border-top: 0;
}

